How to ID Metric Threads
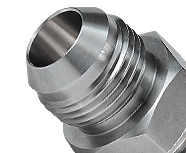
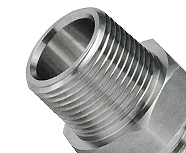
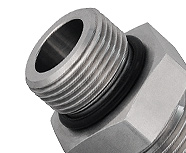
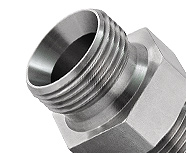
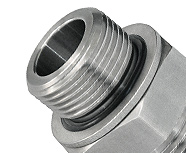
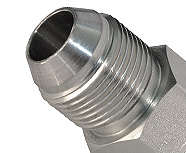
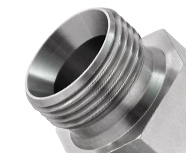
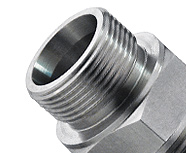
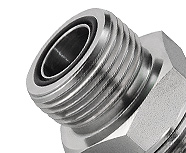
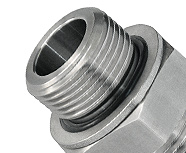
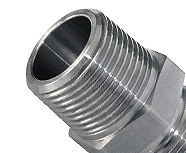
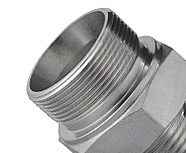
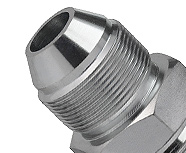
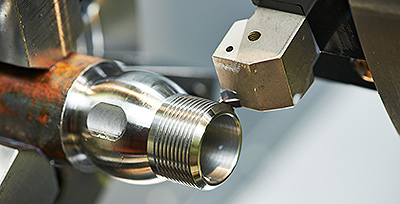
Metric threads share many characteristics with British threads, so caution must be taken when attempting to differentiate the two. First, if the Metric thread is DIN 7631 it will have a 30° chamfer on the male thread, the same as a BSPP male. For fittings in port application, Metric fittings (ISO 9974) also mimic BSPP (ISO 1179) stud ends with the only difference being the threads. BSPT fittings closely resemble Metric taper fittings, although Metric taper is far less common. There are also variations of the sealing surfaces among different Metric fitting types that can create difficulty when attempting to identify.
For Metric parallel threads, taking a caliper reading of the threads outer diameter in millimetres (mm) will give a reading of the exact thread size but not the thread pitch. For example, a caliper reading of 12.03mm indicates it is very likely a 12mm thread. We still do not know however if it is 1.0 or 1.5 thread pitch (or some other pitch).
These steps should be taken in order to ensure you have successfully identified the proper Metric thread:
- Identify if the thread is parallel or tapered
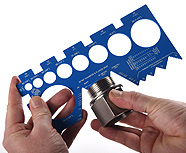
- Determine the thread pitch in mm using a thread gauge or calipers (typically 1.0, 1.5, or 2.0, but other sizes do exist)
- Determine the thread O.D (male thread) or I.D (female thread) using calipers.
- Find the closest match on the adjacent chart (thread O.D and pitch combine into a “thread callout” such as M12 x 1.5 indicating a 12mm O.D with 1.5mm pitch)
- If a seal or angled sealing surface exists, use it to identify which specific type of Metric fitting it is on next page’s chart.
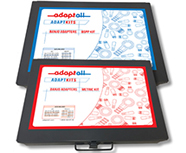
- To simplify this process, try Adaptall’s TGK (thread gauge kit).
Metric Thread Specification Chart
| Thread Callout | Thread Pitch (mm) | Male Thread O.D (mm) | Male Thread O.D (inches) | Female Thread I.D (mm) | Female Thread I.D (inches) |
|---|---|---|---|---|---|
| M8 X 1.0 | 1.0 | 8.0 | 0.315 | 6.9 | 0.272 |
| M10 X 1.0 | 1.0 | 10.0 | 0.394 | 8.9 | 0.35 |
| M10 X 1.5 | 1.5 | 10.0 | 0.394 | 8.4 | 0.331 |
| M12 X 1.0 | 1.0 | 12.0 | 0.472 | 10.9 | 0.429 |
| M12 X 1.5 | 1.5 | 12.0 | 0.472 | 10.4 | 0.409 |
| M14 X 1.5 | 1.5 | 14.0 | 0.551 | 12.4 | 0.488 |
| M16 X 1.5 | 1.5 | 16.0 | 0.63 | 14.4 | 0.567 |
| M18 X 1.5 | 1.5 | 18.0 | 0.709 | 16.4 | 0.646 |
| M20 X 1.5 | 1.5 | 20.0 | 0.787 | 18.4 | 0.724 |
| M22 X 1.5 | 1.5 | 22.0 | 0.866 | 20.4 | 0.803 |
| M24 X 1.5 | 1.5 | 24.0 | 0.945 | 22.4 | 0.882 |
| M26 X 1.5 | 1.5 | 26.0 | 1.024 | 24.4 | 0.961 |
| M27 X 2.0 | 2.0 | 27.0 | 1.063 | 24.8 | 0.976 |
| M30 X 2.0 | 2.0 | 30.0 | 1.181 | 27.8 | 1.094 |
| M33 X 2.0 | 2.0 | 33.0 | 1.299 | 30.8 | 1.213 |
| M36 X 2.0 | 2.0 | 36.0 | 1.417 | 33.8 | 1.331 |
| M42 X 2.0 | 2.0 | 42.0 | 1.654 | 39.8 | 1.567 |
| M45 X 2.0 | 2.0 | 45.0 | 1.772 | 42.8 | 1.685 |
| M48 X 2.0 | 2.0 | 48.0 | 1.89 | 45.8 | 1.803 |
| M52 X 2.0 | 2.0 | 52.0 | 2.047 | 49.8 | 1.961 |
| M60 X 2.0 | 2.0 | 60.0 | 2.362 | 57.8 | 2.276 |
If you have identified the fitting as having a Metric thread you still need to determine what version or style of Metric Fitting it is.
Metric Threads and Methods of Sealing

DIN Tube Fittings
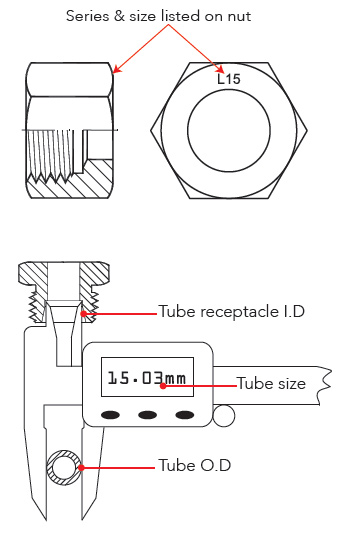
As previously mentioned, DIN tube fittings have a 24° tapered throat on the inside of the male fitting which should clearly identify it as being DIN if a Metric thread has also been identified. To identify which series and tube size the fitting belongs to, examine the tube nut: most manufacturers indicate the tube series and size on the nut itself. The system used for this marking combines TUBE SERIES with TUBE O.D, for example: the size of 15mm tube in the L series is shortened to L15.
If the series and size is not listed on the part, match the tube O.D with the metric thread callout (thread size and thread pitch in mm) on the chart provided to find the corresponding tube series and size:
DIN Tube Extra Light Duty (LL), Light Duty (L) & Heavy Duty (S) Component Compatibility Chart
| Tube Series | Tube O.D |
Metric Thread Callout |
Tube Nut Part # |
Cutting Ring Part # |
Tube Plug Part # |
Tube Cap Part # |
|---|---|---|---|---|---|---|
| LL Extra Light Duty |
4 mm 6 mm 8 mm 10 mm 12 mm |
8 mm x 1.0 10 mm x 1.0 12 mm x 1.0 14 mm x 1.0 16 mm x 1.0 |
5201LL-04 5201LL-06 5201LL-08 5201LL-10 5201LL-12 |
5202LL-04 5202LL-06 5202LL-08 5202LL-10 5202LL-12 |
||
| L Light Duty |
6 mm 8 mm 10 mm 12 mm 15 mm 18 mm 22 mm 28 mm 35 mm 42 mm |
12 mm x 1.5 14 mm x 1.5 16 mm x 1.5 18 mm x 1.5 22 mm x 1.5 26 mm x 1.5 30 mm x 2.0 36 mm x 2.0 45 mm x 2.0 52 mm x 2.0 |
5201L-06 5201L-08 5201L-10 5201L-12 5201L-15 5201L-18 5201L-22 5201L-28 5201L-35 5201L-42 |
5202-06 5202-08 5202-10 5202-12 5202-15 5202-18 5202-22 5202-28 5202-35 5202-42 |
5203L-06 5203L-08 5203L-10 5203L-12 5203L-15 5203L-18 5203L-22 5203L-28 5203L-35 5203L-42 |
5204L-06 5204L-08 5204L-10 5204L-12 5204L-15 5204L-18 5204L-22 5204L-28 5204L-35 5204L-42 |
| S Heavy Duty |
6 mm 8 mm 10 mm 12 mm 14 mm 16 mm 20 mm 25 mm 30 mm 38 mm |
14 mm x 1.5 16 mm x 1.5 18 mm x 1.5 20 mm x 1.5 22 mm x 1.5 24 mm x 1.5 30 mm x 2.0 36 mm x 2.0 42 mm x 2.0 52 mm x 2.0 |
5201S-06 5201S-08 5201S-10 5201S-12 5201S-14 5201S-16 5201S-20 5201S-25 5201S-30 5201S-38 |
5202-06 5202-08 5202-10 5202-12 5202-14 5202-16 5202-20 5202-25 5202-30 5202-38 |
5203S-06 5203S-08 5203S-10 5203S-12 5203S-14 5203S-16 5203S-20 5203S-25 5203S-30 5203S-38 |
5204S-06 5204S-08 5204S-10 5204S-12 5204S-14 5204S-16 5204S-20 5204S-25 5204S-30 5204S-38 |
Kobelco Fittings
Kobelco fittings are essentially the same as 24° DIN Metric tube fittings however all sizes of Kobelco threads have a 1.5mm pitch. All tube accessories for Kobelco fittings belong to the L series and are fully interchangeable. However, the only sizes that are truly unique to Kobelco are in the list below.
Kobelco Component Compatibility Chart
| Tube Series | Tube O.D |
Metric Thread Callout |
Tube Nut Part # |
Cutting Ring Part # |
Tube Plug Part # |
Tube Cap Part # |
|---|---|---|---|---|---|---|
| L | 22mm 28 mm 35 mm |
30 mm x 1.5 36 mm x 1.5 45 mm x 1.5 |
5201L-22-30X1.5 5201L-28-36X1.5 5201L-35-45X1.5 |
5202-22 5202-28 5202-35 |
9248-22-30 9248-28-36 9248-35-45 |
9249-22-30 9249-28-36 9249-35-45 |
Komatsu Fittings
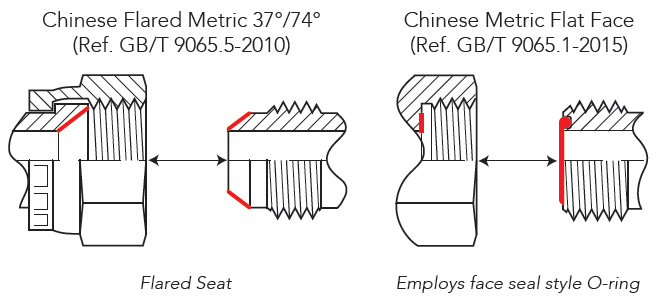
Komatsu fittings have a 1.5mm thread pitch in all sizes and seals via a 30°/60° cone seat. If you identify a Metric thread with a nose cone be very careful to distinguish if it’s actually a 30°/60° (Komatsu) cone seat instead of 37°/74° (GB Chinese).
37°/74° and Flat Face Chinese Metric Fittings
These fittings are becoming more commonly exported out of China on heavy equipment using Chinese standards. What defines these standards are that they both utilise North American styles of sealing but with Metric threads. This includes O-ring face seal (ORFS) and 37° flared seat (JIC) sealing methods, however the UN and SAE threads are replaced with Metric and do not follow traditional thread pitches in all sizes.

Metric Taper Threads
If you have a Metric tapered thread, one would undergo the same initial steps for identification of thread pitch as a parallel Metric thread. Also similar to parallel Metric threads is that an O.D measurement will reveal the actual thread size (i.e. 18.01mm measurement means the thread is likely M18). However, to do this accurately with Tapered Metric threads one must measure the O.D at the third row of threads from the end of the fitting.

